The world of meaningful 3D experiences is here today, it’s not the future.
3D capture technologies such as Structure from Motion (SfM) photogrammetry, laser scanning and structured light scanning are in 2019 fast becoming mainstream. The software is getting better, and crucially, computers, tablets and phones are now fast enough to fluidly display 3D content. The world of meaningful 3D experiences is here today, it’s not the future. Let’s use 3D to help enhance current experiences and curate new ones.
There’s been a lot of discussion about curating 3D models in the past that have mainly focused upon the (important) data aspects–formats, digital archiving, data management, data preservation, and how to provide access to it all. Whilst this is vital, most 3D creators don’t have access to digital preservation systems, and may know little about file formats. And most will be wanting to know what they can do with 3D capture, and how it can be used to enhance visitor or customer experiences.
How can we go beyond the ‘wow’ moment of spinning a 3D object around on a screen and instead use it as a powerful tool for conversation and communication?
But what about curating 3D objects? Good curating of any creative expression or artefact requires thought, intent and meaning. How can we go beyond the ‘wow’ moment of spinning a 3D object around on a screen and instead use it as a powerful tool for conversation and communication? We believe that good groundwork in the preparation of 3D digital objects is fundamental to a well-curated and engaging experience.
Here are my top 10 tips on curating 3D objects for recording and preserving knowledge and providing engaging experiences.
1. Establish the level of accuracy required
Think about why you are capturing a 3D model. Do you want to create a detailed digital surrogate to allow close study of fine details, and to allow remote study, thereby increasing an object’s knowledge value? Are accurate measurements and cross sections going to be an important part of the outcomes from your data? If so, you may wish to hire a specialist company to do this for you, as getting sub-millimetre accuracy is very difficult to achieve without the right skills and equipment.
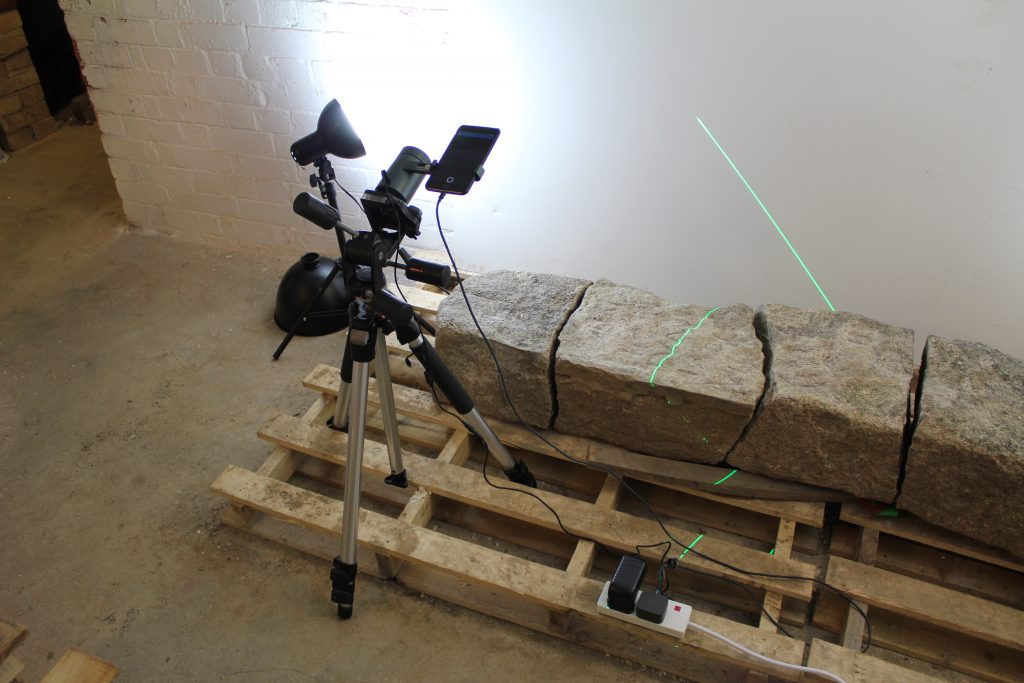
If you want to provide a ‘good enough’ 3D model to show off your collections, then read on. Models for online use can easily be derived from super-accurate models–the two approaches are not mutually exclusive.
2. Raw data
Back it all up
Keep all of the data used to create a 3D model. Back it up so that it’s not stored in one place. If you think it’s safe because it’s on an external hard drive, unfortunately it’s not–hard drives fail more frequently than you may think. If it’s on two drives, that’s better. If it’s on two drives and an off-site backup, that’s much better still.
Describe it well
Use a simple project directory structure for your models. Think about the future–could someone who you’ve never met navigate around your files? Think about creating notes for your future self. If something needs explaining, use a plain text file like ‘readme.txt’. If you use Windows, you can make these in Notepad or TextEdit on a Mac.
Make sure you rename the photos and use a numbering sequence, in case they get mixed up in the future.
For example the photo sequence IMG_1534.JPG to IMG_1589.JPG won’t be as meaningful as mymuseumname-objectnumber-objectname-0001.jpg to mymuseumname-objectnumber-objectname-0055.JPG.

If you’re using SfM/photogrammetry then those photographs you used to create your model could be re-processed into a better model in the future as software and hardware improve. If you happened to lose the model, then you can regenerate it from the photos.
3. High resolution models
When you first create a 3D model, chances are your software will create a highly detailed model first. From this master model, you create your lower detailed model to put online. Never discard the original high detail/resolution model. It can be used to update the online model with more detail in years to come, they can be used to study the object through enhancing the surface, and enable remote study to universities and scholars used to dealing with 3D data.

Close-up of the high resolution wireframe surface of a pewter goblet. The tiny triangles measure just fractions of a millimetre. 
The pewter goblet and its 3D digital surrogate.
Share data – create new knowledge
Even better, make the high resolution data available. New knowledge can be created by others with good access to the data you have generated. This may then open up new possibilities for curation suggesting how to communicate about your objects in different ways. This is achieved by simply stating on your website that people can request the data by email or through a contact form, perhaps. Don’t worry about providing automatic dataset downloads just yet (but great if you do).
Your high resolution master models and the lower resolution models for the web should always be kept in a place that is easy to find again. If you wanted to change to a different online 3D platform in the future this will be essential.
4. Textures for display
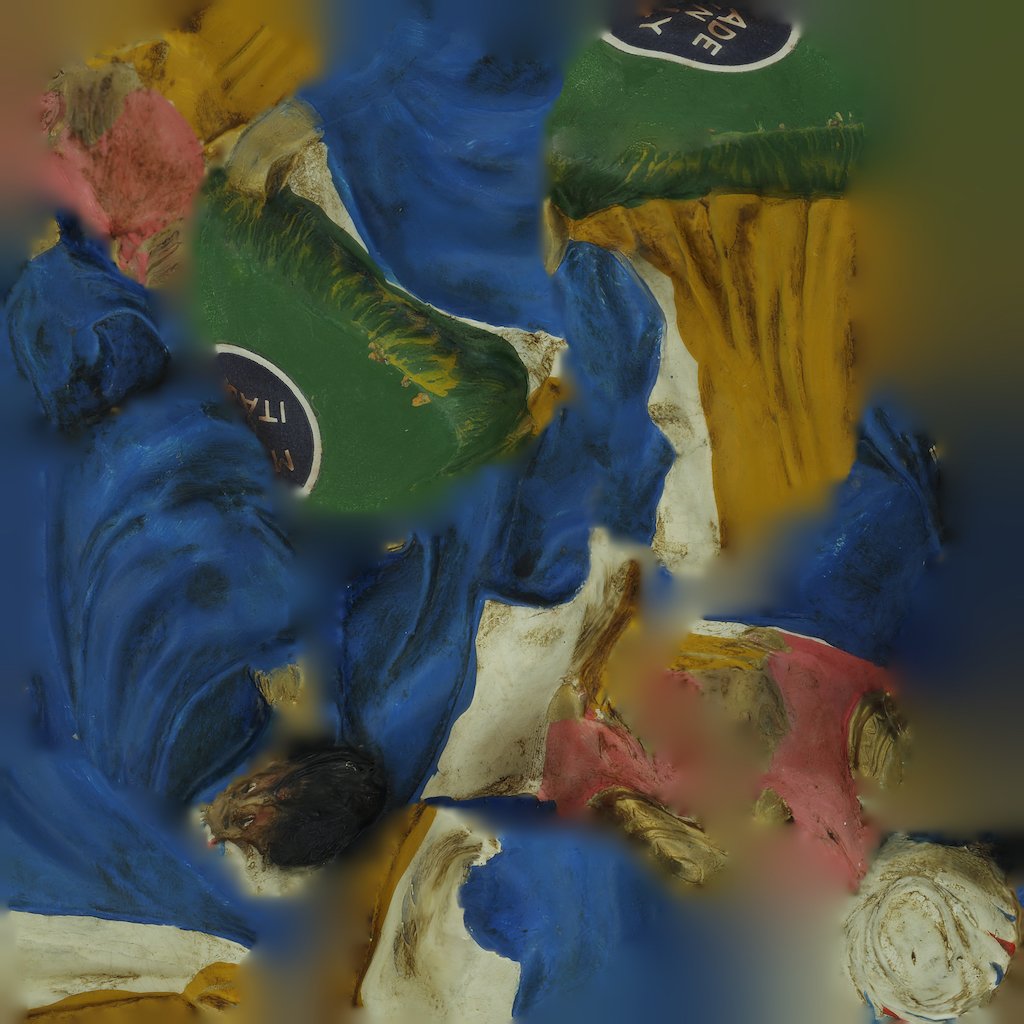
If public display is part of your desired outcome, and the natural appearance of the object is crucial, then generate a high resolution texture. For example, if you wish to preserve the colouring of your museum object, then use your 3D software to generate a 4K texture (4096×4096 pixels) or higher. Sketchfab, for example, will downsize the texture size to suit mobile devices.
Textures aren’t always necessary, though. Carved rock art and inscriptions, for example, are often clearer when a simple grey or false colour is used.
5. Share your 3D models online
Once you’ve made your high detail models, make lower resolution models to publish online, such as on Sketchfab or Google Poly.

Use Sketchfab’s Collections feature to interpret several models together. You can also add models to a Collection from other users. A simple but effective curation tool that will provide you with the opportunity to curate objects in ways you might not be able to in a gallery.
It brings a really interesting quality (of wonder & aura) to the objects.
Felicity Tattersall, Illustrator and Museologist.
Beyond the looking glass
While we all know why precious art and objects are protected by barriers and showcases, we are also aware of how the experience of an artefact can be hampered by them. Sharing high quality, beautifully textured 3D models online and curating them in the digital space, can give people a sensation of intimacy that is not possible in a gallery setting.
Felicity Tattersall, illustrator and museologist, reflected on the relationship of the model to the original object, “it brings a really interesting quality (of wonder & aura) to the objects. I wonder if it could be incorporated into a fine art response in some way?”
6. Metadata
Describe your 3D models properly, using descriptive titles with further information in the description field.
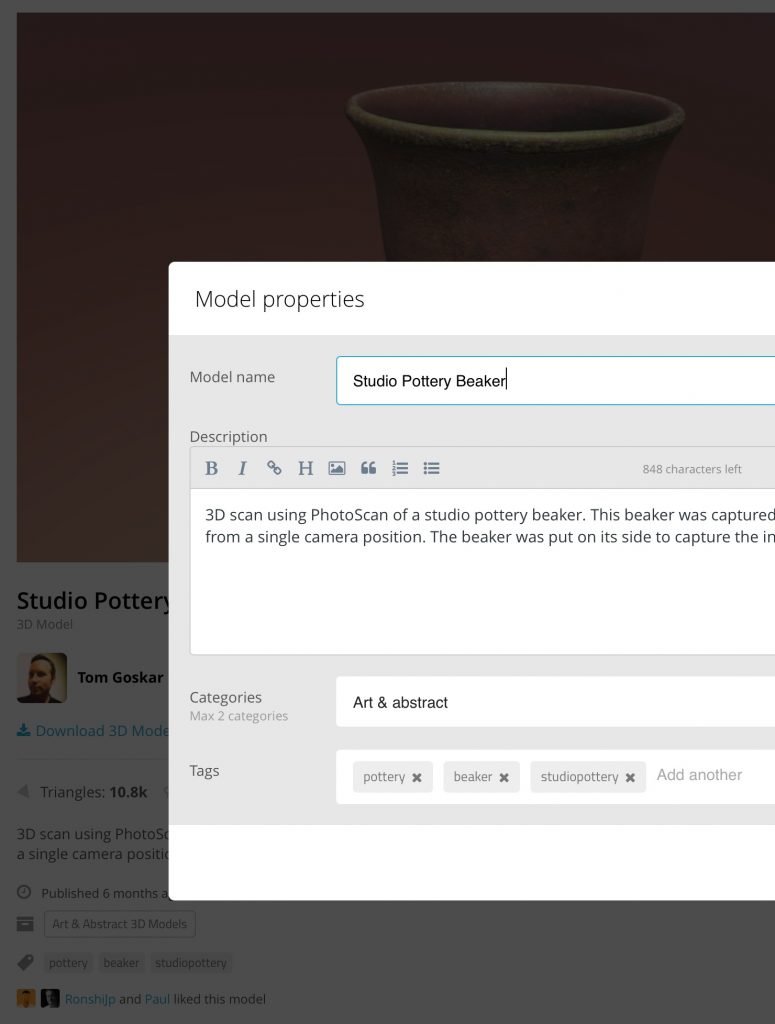
At the end of your description explain how the model was created, such as using capture methods, the camera or scanner used, and processing software. For example you could say: “This model was created using photogrammetry. A Canon 550D was used to capture the object which was processed in Agisoft Metashape and edited in ZBrush.” This can help people with a greater technical knowledge understand the processes used to create what they’re looking at.
Use tags and categories to help organise your 3D models and make them easy to find. Think about the different language preferences of your users, particularly any target audiences you have in mind. What would they be looking for when coming across your model?
Keep copies of all metadata–these are the text and images that you put online to accompany your 3D models. Good curators value research and knowledge and don’t dispose of it just because it is digital and the final product has been completed. Store it with your project files (high res model, low res model) so that you always have copies of your own data. Use Word, rich text, or plain text files. Something that you will be able to open in a few years time.
7. Storytelling: annotate your object
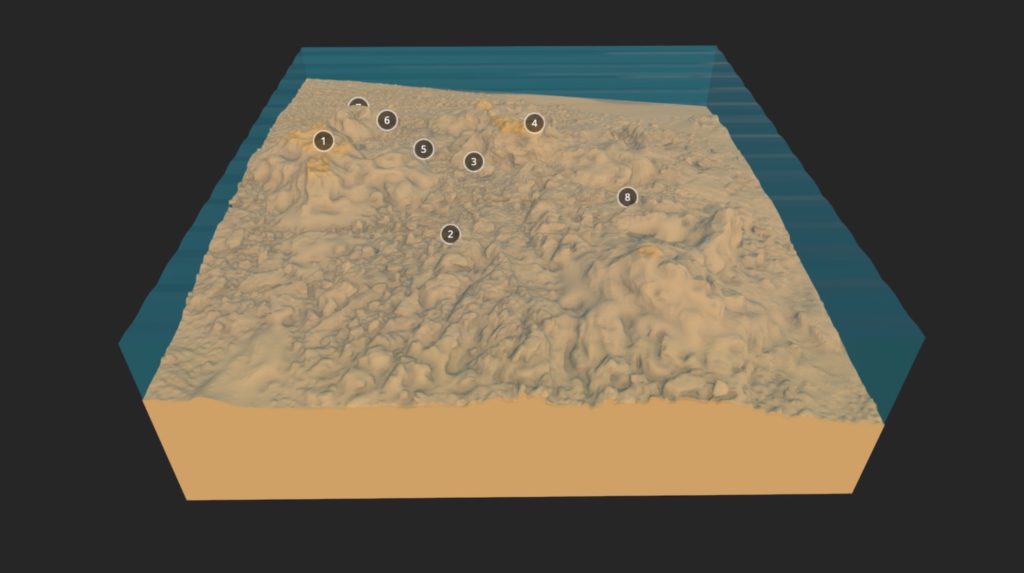
Use captions such as Sketchfab’s 3D annotations feature to further explain or interrogate your model. I have used this method to provide a simple but effective tour around a submerged shipwreck site. You could use it to explain different parts of an object. Annotations on Sketchfab are interactive – they can be clicked on and contain text and images so you have plenty of scope for creative interpretation. Annotations or captions don’t have to be dry descriptions, they might contain questions to make people think, maybe a little bit of poetry or just a visually-arresting image that will trigger a thought, emotion or reaction. Take your users on a bit of a journey through a story.
8. Augmented Reality (AR)
If you decide to use Sketchfab, you can use the Sketchfab app to experience your 3D models using Augmented Reality if you have a recent (3 year old or newer) smartphone or tablet.
The phone camera detects flat surfaces and can sit a 3D model on a given surface like a table, and allow free exploration of the object. If your texture resolution is high enough, you can get very close to the object – much closer than you can to the original if it is behind glass – and see every small detail.
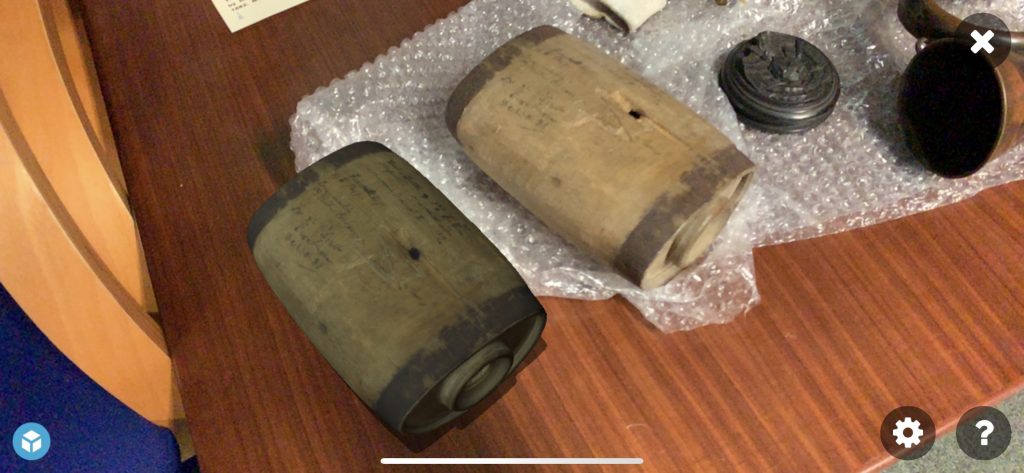
Experiment with AR. You can use it to help tell a story, add to a gallery exhibition, or provide a meaningful interactive experience to someone who can’t physically access your collection, museum or gallery.
9. Make it big
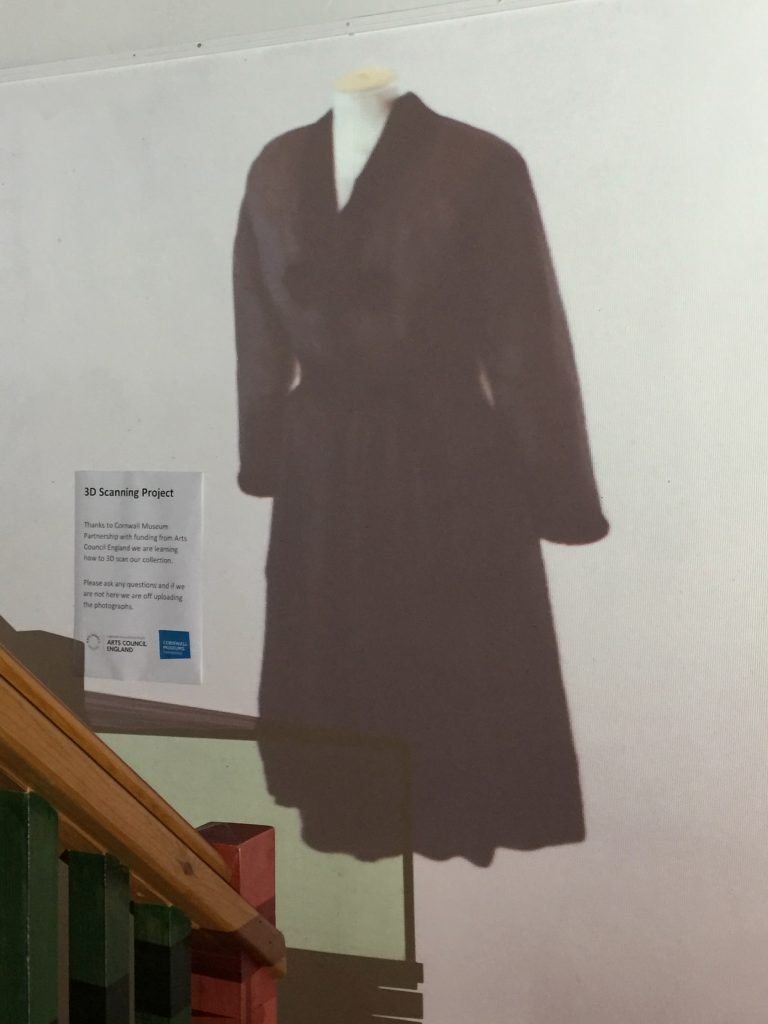
As part of your exhibition, workshop or event, why not take 3D models beyond the screen and project them? Using Sketchfab’s viewer you can make objects slowly rotate as if they were on a turntable and this can be great when projected full size or larger.
Curate a genuinely immersive experience that might make people question what’s real!
This image shows a life size projection of a mannequin at the Museum of Cornish Life. The costume would have otherwise been stored away, as there was no room to display it or indeed many other wonderful outfits. Sketchfab provide ways to make a model autospin.
10. Experiment
In the introduction to this post I said, “the world of meaningful 3D experiences is here today, it’s not the future.”
As curators we must constantly innovate, to help us communicate our collections in new, engaging and audience-appropriate ways. To succeed we must experiment. Don’t be afraid to try out a new approach.
What do you have lying around?
Do you have an iPad laying unused in a drawer? Put the Sketchfab viewer on it and use it show 3D models in your schools or outreach programmes. This is a great example of how the Science Museum Group are providing 3D models for the classroom.
Put an iPad into kiosk mode, place it in a secure kiosk mount, and try out a model or two in a gallery. Dust off that projector and project something into an exhibition, perhaps of an object where there isn’t the space or cabinet to display it physically. Perhaps a screen-based or projected in-gallery 3D model can show details more effectively than an illustration, such as enhancing rock art or inscriptions.
Try out a supervised Augmented Reality session to help people get up close to some virtual objects. Embed a 3D model into your online collections, or use one in your online exhibitions if it might help you to tell a story more effectively.
3D can be a highly effective tool for curation. There is no rulebook. Decide what might be best for you, and most importantly your audiences, and try it out.
Finally, look to others for inspiration and know-how. Check out these ideas and example from Sketchfab’s Thomas Flynn.

Tom Goskar is the Archaeologist and Audiovisual Specialist at the Curatorial Research Centre and has just completed a sabbatical research project with support from an Arts Council England Developing Your Creative Practice (DYCP) grant. Explore more of Tom's 3D work on Sketchfab.
